Showing posts with label Margo Duke. Show all posts

Thursday, March 28, 2013

Ruffles and Flounces with Her Majesty Margo


Let me start by saying that if you have any interest in felting, fibers, Textile collage or texture and you get the opportunity to take a workshop with Margo Duke JUMP AT THE CHANCE!!!!   She has earned her Title of Her Majesty!!  Her work is stunning and innovative and luxurious and she loves to share all of her tips and tricks as she is secure in the Knowledge that no one can collage fibers and fabrics exactly like another person.  She is a total delight.  Ruffles and Flounces was my fourth workshop with Margo and this class was held at the fabulous space and shop for Altered art and Fabulous batik fabric, Artistic Artifacts.
Whenever we gather with Margo, she brings out her glorious samples and inevitably we all get caught up in asking how and what and exclaiming and drooling over each piece.  This little tease of a trunk show is well worth the cost of the workshop, but wait there is more!!!  Then we see garments and my friend Chris is asked to model the garments so we can see the fit of each!! Then the pieces are passed around and finally they are counted to make sure they have not sprouted little furry feet.  ( just kidding about the last bit)


I took several photos fo a couple of her samples . These pieces are done with wool roving and collaged with silk fabrics, lace doilies, yarns and other fibers.  All of the work that you will see here are achieved using water, a bit of soap and woman power.  No stitches were taken to create these pieces!!!!


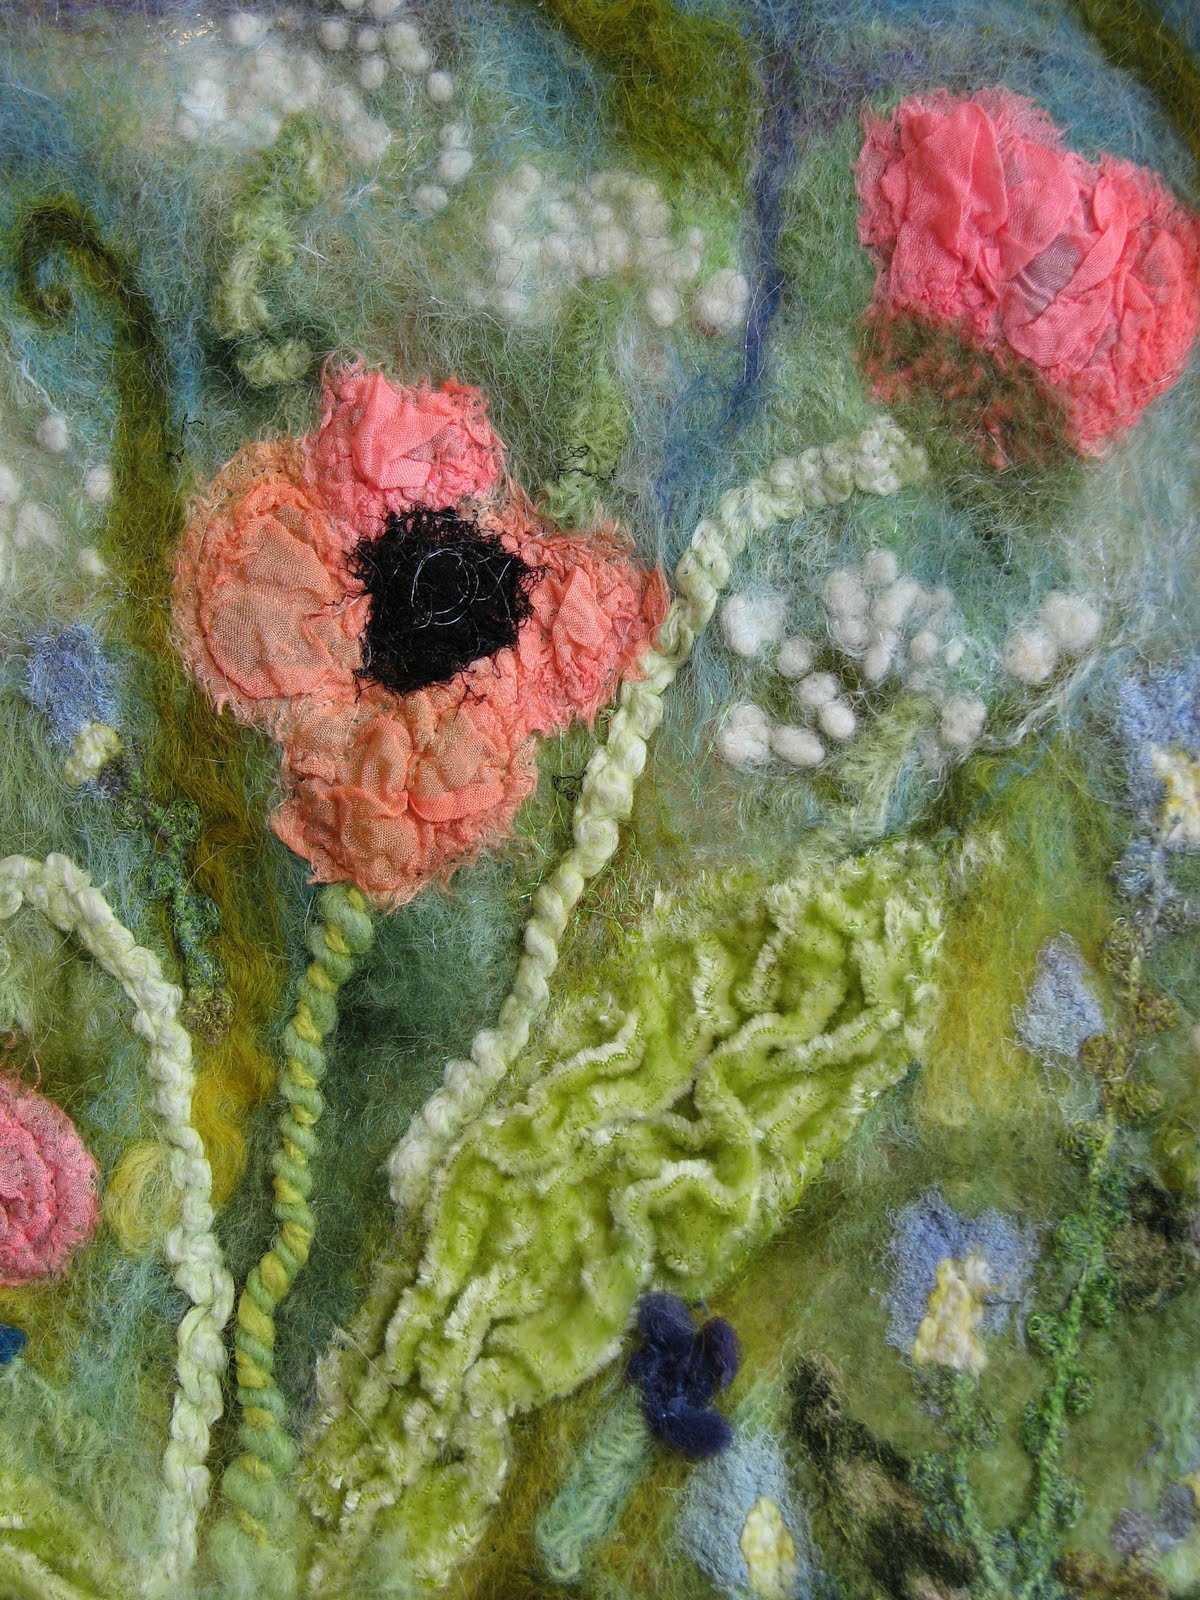
The Texture is totally breathtaking!!  The little red berry like bits are called wool nepps.  They are a bi- product of not good shearing.  The bits from bad shearing practice are called second cuts, by spinners.  This happens when the shearer does not get as close to the skin and therefore the longest fiber form the animal and has to return to make a Second Cut to even out the sheep's wool appearance.  this second cut ends up as lost part of the best part of the fleece, at least it was till some bright person figured out how to make these Nepps.  They can be dyed any color and they give wonderful texture , as you can see!


The first garment that Chris modeled was this wonderful vest.


Margo explained how she makes her collaged felt two sided so the garments can have interest on the inside as well as the outside.  FABULOUS!!

.
 
The next garment was a wonderful soft colored jacket.  


This back view gives a great idea of how collaged Margo's pieces are- remember this is all done with water, a bit of soap and lots of hand  manipulation.  Then the pieces of felt collage are stitched together to make the garment.

( Click on any of these pictures to see enlargements and more detail)

I started out my project with a piece of green silk gauze with pink roses on it and a piece of tan cotton gauze that had red and blue floral print.  These remnants were topped by a large piece of chartreuse green pre-felt.  you can see the pre-felt in the picture above along the bottom edge.  I then layered the green pre-felt with hand dyed vintage cotton doilies, silk hankies, silk fibers and silk gauze  fabrics, sari silk ribbons and fun yarns.  Some of the silk gauze was rolled into 3-d rose shapes.  You can see the rose shapes in the center left of the above picture and in the middle of the picture below.
These two pictures were taken before the piece was wet down with soapy water and rolled and rolled and rolled some more!!!
This is a picture of the fully felted and fulled collage!  It shrank by 30%.  Along the bottom edge you can see the silk ruffle that was created by capturing one edge of a long piece of silk gauze ( cut from a thrift store skirt) .  As the wool shrinks that has penetrated the silk fabric, the silk gets carried along with the wool, resulting in wonderful ruffles and flounces.

  At the top of this picture you can see the felted in cotton doily- look at the wonderful texture- I do so love it!!!  The base of the silk roses have been captured by the wool and drawn in more tightly and are secured.


The br
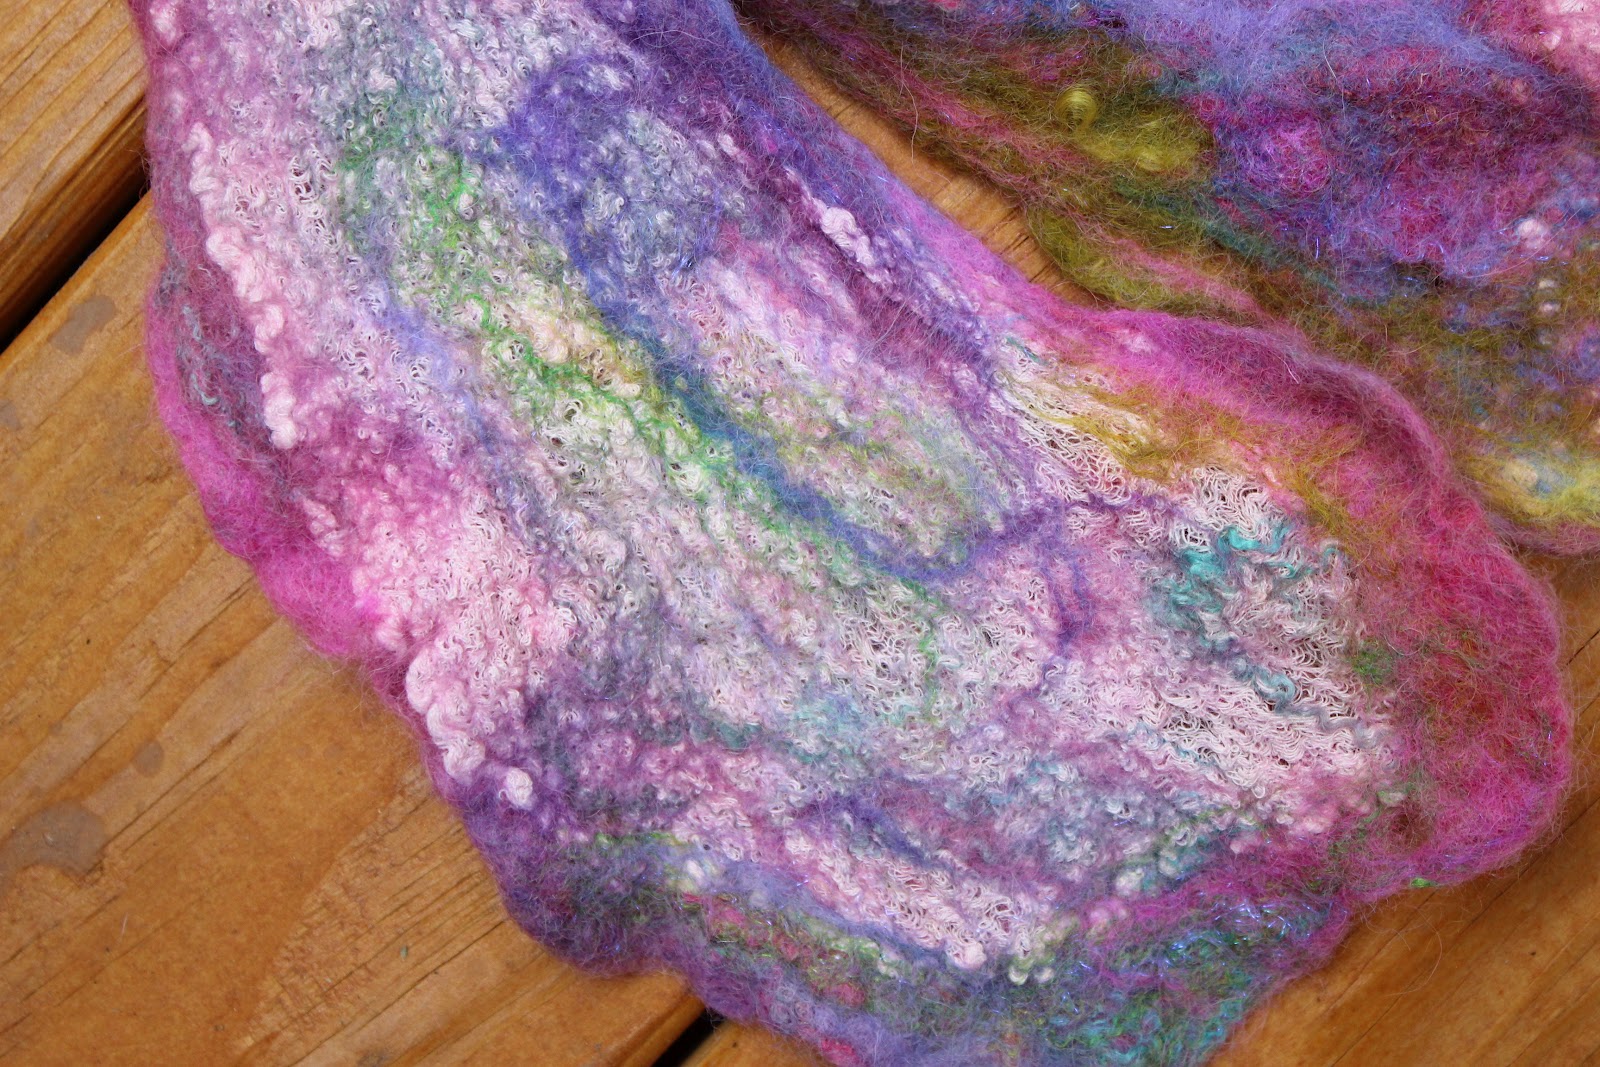
ight blue areas in this picture show the pleating that I accomplished by hand pleating the fabric when wet and then covering with a very wispy bit of wool roving before the rolling process.


Here you can also see a good view of the ruffled silk from the pink skirt.


Here is a shot of the almost finished collage piece.  Just below the green pre-flet area you can see a piece of bright blue silk with a beaded motif on it.  This bit was cut from a silk beaded blouse, again from a thrift store.

now here is the same area once the felting and fulling is complete.  the beading is there along with the wonderfully puckered blue silk fabric.  So fabrics that have been beaded and sequined can be used to add yet another element to the felted collaged piece.  No needle and thread required!!!

Here you can see the back of half of the piece,  the half with the green silk gauze.  You can see how the green pre-felt fibers have penetrated the silk gauze.

This is the other side of the back , the half with the tan floral cotton gauze.  I love all of that texture!!!!

As you can probably tell I am more than a bit excited about  the possibilities for all of these wonderful
techniques!!  You will definitely be seeing more of this type of work here very very soon!!

So if you ever see classes, workshops or lectures offered by Her Majesty Margo Duke, DO NOT HESITATE TO SIGN UP AND DIVE IN!!!


Wednesday, June 6, 2012

Nuno Felting Class Project/ Experiment

In my previous post I wrote about my recent class with the amazing Margo Duke!( If you click on Margo's name you will be taken to her Flikr library of amazing felted creations!! SWOON!!)  I love the class and had a great time being with Margo and her wonderful spirit and trying to learn all that I can . I finally got around to finishing up the project that I started in the class and I was not at all pleased with the result.  This happens, more times than I care to remember, but when one is just trying to get a handle on a new technique, the path is not always free of ruts and obstacles. In this case I think that I pushed the envelope too much.  there is a reason for the old axiom, Keep It Simple, STUPID!!! This was one of those times.  So when I got a less than stellar result, I deconstructed it and remade the wool and cheesecloth part into this!
Once I separated the cheesecloth/wool from the silk I had a square of wool/cheesecolth with stripes of cheesecloth.  I cut the square into three rectangles and attached the rectangles to each other end to end.  In that process and the subsequent wet felting, several holes developed.  I like the random placement of the holes and I plan to add beads and stitching in those areas to add more areas of interest and tiny sparkling surprises.The edges of the scarf are very organic and the scarf itself is extremely lightweight and is full of frothy texture from the felted cheese cloth.


So from a lemon I got some extra special lemonade and I made" Nuno" felt with cheese cloth rather than silk- it is still "Nuno", as it is definitely a "New" Cloth!!


the thin threads of color that you can see running over the top of the cheesecloth are silk fibers that I added into the felting structure for some more color interest and silky shine.


  I was able to remove the vintage silk scarf that I had tried to felt with and will use it for another project.
So, in the end, it is all good and I learned  a lot, mostly about what not to do.  But often the big mistakes make for the most valuable lessons!!

So now I will be adding some bead work to this piece and setting up a bunch of lengths of cheese cloth for the dye baths as I think that I have stumbled on something that I really want to explore!!!
thank you again Her Majesty Margo Duke for yet another great class!!!

Tuesday, May 29, 2012

Classes,Classes and More Classes!

Teaching classes, making class samples, coming up with new class ideas and writing class descriptions is what my life has consisted of during the past few weeks.  Oh yes, I also had the pleasure of taking another class with Her Majesty Margo, Ms Margo Duke- this time it was Nuno felting!!
The word Nuno means "new" in Japanese and Nuno felting refers to the creation of a "NEW" fabric made by combining wool with another textile- ususally silk,  by forcing the wool fibers through the weave of the silk fabric in the felting process- hence Nuno Felting.
Margo brought along her baskets brimming with glorious samples and the hit of the show was her latest Blue Ribbon Award winning coat from the Maryland Sheep and Wool Show.  I think that she calls it her Butterfly Coat.  It is stunning and amazing and so inspiring to examine in person!!! no wonder it was awarded  Best in Show !!! Bravo Margo!!! What a Master with fibers!!
In these two shots you see my good friend and fellow fiber artist Ms Christine Vihn, modeling the glorious piece!

This vest won the Best In Show Award at last years Wool Festival.  It takes an awful lot of work and creativity to unseat the Queen!!!  How lucky we are to have her live so close to Artistic Artifacts so she can pop in for classes almost every month!!!!

Nuno felting is by no means an easy or quick process.  One must first gather supplies- wool, textiles, silk, lace etc, lay out the design with the wool fibers, assemble the felting sandwich of silk, wool fibers, plastic sheeting; all on bubble wrap and a towel, wet the fibers down and then begin to work the wool fibers through the textile of choice.  PHEW!!! NOT DONE YET!!!!  Once you see evidence that the fibers are getting through the textile, the rolling begins!!
Barbara spent a lot of time laying out her wool fibers on her piece of white lace.  the wool will work it's way through the weave of the lace and lock onto the lace fibers and then take the lace along with it when the wool is fulled (shrunk).

Lauren and Nga were rolling and rolling and rolling and unwrapping, re-wrapping and rolling some more. Margo came by to check the progress and the ladies were able to stop rolling and proceed to rinsing and throwing !  YES, this process takes lots of energy and one can work up quite a sweat. there is even a special stance that one must assume to avoid back strain!!!

Marji was quite pleased with her piece even though Margo had determined that the rolling was not quite done!!
I have not finished my piece yet and I have only just begun the rolling step. i spent a long time laying out my fibers and included some tussah silk along with the wool to add some sheen and jots of bright color. I will post pictures of the piece as soon as I get to finishing it!

The next time you see a felted garment I hope that you will understand some of the effort both physical and creative that went into the creation of each piece.  Whatever the asking price , if the piece is for sale, it is most likely TOO LOW!!!

Now I will leave you with a few shots of what is blooming in my garden!
 Japanese Painted Fern

 New Dawn Rose

Endless Summer Hydrangea

 Siberian Iris
 Siberian Iris with Hydrangea


More Endless Summer Hydrangea

Yes ,I do LOVE my Hydrangea!!

Sunday, April 8, 2012

Embellisher Felting Workshop with Her Majesty Margo!!!

I have been gone for so long!! I have neglected you all and my poor blog!! I have been busy, busy, busy and I hope that the next several posts will help to explain what I have been up to!!


One of the major highlights of the past several weeks was a Class with this wonderful and talented lady, Her Majesty Margo, Ms. Margo Duke!!

(above photo taken by Susan Elliott)

Here she is as she appeared in class with her adorably stylish felted Fascinator chapeau and her gorgeous wool and silk shrug that she calls her Butterfly Wrap!
I was quadrupley excited to take this class as I found out that my dear blogging friend, the  amazing thread and bead artist , the delightful Susan Elliott would be traveling down to meet Margo and take the class as well!!   Oh my! almost more than I could stand!!!
 We had lots to cover in our Gown Fragments class and Margo got right to it demonstrating how to achieve some of her beautiful looks with our embellishing machines.
Margo is always so very generous with the materials that she provides for her classes and we each chose some silks and ribbons and fleece and silk fibers to create with.  Our class was held at the wonderful Artistic Artifacts in Alexandria, so anything else that we might need was readily available, including the felting machines.  (Judy Gula is now a distributor for the Simplicity Felting Machine which works like a dream and does not cost an arm and a leg.  If you are considering buying one of these wonderful machines, look at this machine first- Judy can tell you all about it and sell you one too!!
                                                   This is the palette that I chose to work with.  No surprises here!!!

This is the progress that I made on my piece during the class.  All of the work that you see here was done using the felting machine.  you can also see that I used my regular sewing machine to add some free motion embroidery work .  once the wet felting portion of the project is done you will see just how much texture this extra stitch work adds.
The small pink circles that you can see are little circular rosettes of wool yarn that i felted down into the wool and silk fabric.  All sorts of fibers and yarns and trims can be added to this process and my piece became a sampler of sorts for many of the techniques that Margo was demonstrating for us.
Our time together literally flew by and none of us wanted to pack up and leave.  We all would have gladly stayed for a three day marathon class if we could have!!!
Margo has plans to give a class on creating her wonderful little Fascinator Hats and you can bet that we will all be stalking her blog waiting for the next class announcements!! If you ever have the opportunity to work with this delightful lady, DO NOT HESITATE!!!  You will be so glad that you jumped at any opportunity that arises!!
                                  Here we are as a class showing off our work on our gown fragments.
                             (Susan Elliott is standing on the far left in the pink shirt with the great smile!!!)
Once I got back home I set to wet felting my sampler piece.  If you look back at the area around the large purple flower you can see a border of green wool that had been embellished to the edges of the purple silk.  once the wet felting was done the green wool had shrunk up so much that it was no longer visible and it had pulled the purple silk along with it to form the much more ruffled and blousey flower!!!!


In fact, all of the luscious silk fabrics had been gathered and ruched in along with the shrinking wool!!  What fabulous fun and a delightful set of techniques to apply to all sorts of different projects!!!
                                Thank you so very much for yet another delightful and delicious class Margo!!!

Sunday, April 4, 2010

Painting With Fibers

You have seen this image before. It is from the previous post about my fabulous Workshop with Fiber Artist Margo Duke. These are the samples that we created in class. The poppy piece was meant to grow into a flower garden scene. This week, after helping a friend with a felting project using my Embellishing machine, I took advantage of the setup and did alot more work on this piece.

Below you can see it after I have added several more poppy buds and little blue silk flowers to the garden.

So far I had only used the Embellishing Machine and done some hand needle felting on this piece. Remember that I had started out with a plain piece of water soluble fabric, also known as Vilene. It really looks like a medium weight interfacing but the magic happens when one adds water!!! So to reiterate, I began with the Vilene and then added all of the fibers to paint my garden scene. It truely looks and feels like one is painting with small bits of fluff and fabric to create a wonderful picture! The next step was to do some Free Motion Embroidery with invisible thread. I had a horrendous time trying to get the bobbin wound correctly- it is very difficult as the thread is really and truely invisible (actually a very fine nylon fishing line type of thread). The thread kept getting caught on the spindle and snapping- So Frustrating!!!! I stopped to take a deep breath- it was either that or hurl the bobbin across the room, never to be found again, when I remembered that Margo had told us to use regular thread in the bobbin and adjust the tension ,if necessary, so the bobbin thread does not show!!! Thank goodness I remembered !!!

So below you will see a picture of the back of the piece so you can see that I did do the free motion stitching.


Then it was magic time!!! I immersed the felted piece in tepid water with a bit of soap and voila, the base Vilene was gone!!!! I then rolled the piece in a layer of bubble wrap and shelf liner and rolled away! After changing the position of the piece several times and rolling till my arms hurt, I rinsed and squeezed the fabric several times, till all of the soap was gone. Below you will see the dried piece after wet felting.


I just LOVE this piece!!! It is so very delicate and thin- there is no denseness what so ever. If it were a larger piece, it would have a wonderful drape and be very different from what one would normally think of as felted material. The secret, as Margo says ,is the Water Soluble fabric!!!!

Here is a detail shot!


I am planning on doing some beading, especailly in the black center of the poppy. I might also add a bit of embroidery. Then I plan to mount it on acid free White matt board and frame it in a shadow box frame. I will be using this technique and my fabulous embellishing machine many times over and taking inspiration from my own garden!!

Speaking of gardens, I thought that I might share some shots of what is blooming in my garden right now. These shots have my mind blossoming with embellishing project opportunitities!!!

My wonderful English Primroses are really putting on a glorious show this year, thanks to all of the precipitation that we have had!!!

>


I love these little tiny Grecian Windflowers. They are small bulbs and they are supposed to spread like crazy if they are happy. I plan to keep them happy!!


I love my Pink Impression Tulips and they are coming back for a third year as I planted them extra deep!!


I hope that everyone had a wonderful Easter and that you are enjoying a beautiful Spring day!! To those of you Down Under, I hope that your fall weather is delightful and that you are enjoying a nice tomato harvest, YUM!!!!!!

LinkWithin

Related Posts with Thumbnails