Saturday, April 21, 2012

A Small Peek and a Title Search


 It started with a piece of felted and fulled white wool sweater as a blank canvas.  With the addition of some wool roving , some dyed cheese cloth, a few bits of knitted sweaters of various fibers, some more roving, an ocean-scape became apparent.( To enlarge photos, click on each shot.)


 Some hand stitches with various green threads, various shades of fine tulle netting,


 Some singeing of organza, some beach rocks stitched into vintage linen pockets


 More layers of tulle and strands of organza kelp, a few fish of various sizes

More hand dyed linens , stitching , beads and some shells, some sponges made from mesh vegetable bags lined with orange silk and the ocean-scape is taking on great depth and detail.

This  tapestry/textile Collage piece will hopefully be my big new piece  for May First Friday at the Artful Dimensions Gallery.  We all like to have new art to debut at our big monthly opening events.  You will all get the First Reveal as soon as I finish the piece.  Not sure what to call it. Any suggestions????????????????

Sunday, April 8, 2012

Mono-Printing On Gelatin at Artistic Artifacts

I taught my first class in Mono Printing on Gelatin for Fabric and Paper Prints on March 31.  We had a  wonderful time playing with paint and brayers and fabric and paper!  I had 4 very inspired students who were anxious to play and experiment.  this is one of those techniques where once you get the hang of the masks and the color sequences and how to save certain areas that you like of previous prints, you simply CANNOT stop!!!

The class was held at Artistic Artifacts, of course!!!

Theresa was working with some gorgeous sheets of hand made papers in all sorts of luscious colors and she got some great prints!

We were working in the back area of the shop and we could not help but be inspired by all of the glorious Batik samples that surrounded us from Batik Timbal, Judy Gula's other business venture!
One of the gals even used some paper toweling fro several of her prints!! there is no end to where one can be taken by this fabulous technique!!
Look at this wonderful print created by Lesley .!!!!  She used trims and ric-rac as her masks to prevent the transfer of paint from the gelatin to the fabric.
This great panel was created by Barb Boatman , one of my art group gal pals.  She was having the best time squealing and laughing and dancing about with her wonderful prints!!  You did not realize that this could also be called an exercise class, now did you???
                                             Here are more  prints from  Barb's collection!

This fabulous print with the addition of the leaf wood block stamping was a big favorite as well.  Judy sells the most wonderful hand carved Wood Block Stamps from India.  You can see her full collection here- all available for order on-line.
After we cleaned up I managed to get everyone to gather for a group[ picture of our favorite prints!! I plan to be offering more sessions of this fast and furious class in the very near future !!   If you are interested and able to take a class during a weekday, I have a class scheduled for May 24th.  There are only 5 slots in each class so if you are interested hop on over to the Artistic Artifacts Web site and sign up!!!

Embellisher Felting Workshop with Her Majesty Margo!!!

I have been gone for so long!! I have neglected you all and my poor blog!! I have been busy, busy, busy and I hope that the next several posts will help to explain what I have been up to!!


One of the major highlights of the past several weeks was a Class with this wonderful and talented lady, Her Majesty Margo, Ms. Margo Duke!!

(above photo taken by Susan Elliott)

Here she is as she appeared in class with her adorably stylish felted Fascinator chapeau and her gorgeous wool and silk shrug that she calls her Butterfly Wrap!
I was quadrupley excited to take this class as I found out that my dear blogging friend, the  amazing thread and bead artist , the delightful Susan Elliott would be traveling down to meet Margo and take the class as well!!   Oh my! almost more than I could stand!!!
 We had lots to cover in our Gown Fragments class and Margo got right to it demonstrating how to achieve some of her beautiful looks with our embellishing machines.
Margo is always so very generous with the materials that she provides for her classes and we each chose some silks and ribbons and fleece and silk fibers to create with.  Our class was held at the wonderful Artistic Artifacts in Alexandria, so anything else that we might need was readily available, including the felting machines.  (Judy Gula is now a distributor for the Simplicity Felting Machine which works like a dream and does not cost an arm and a leg.  If you are considering buying one of these wonderful machines, look at this machine first- Judy can tell you all about it and sell you one too!!
                                                   This is the palette that I chose to work with.  No surprises here!!!

This is the progress that I made on my piece during the class.  All of the work that you see here was done using the felting machine.  you can also see that I used my regular sewing machine to add some free motion embroidery work .  once the wet felting portion of the project is done you will see just how much texture this extra stitch work adds.
The small pink circles that you can see are little circular rosettes of wool yarn that i felted down into the wool and silk fabric.  All sorts of fibers and yarns and trims can be added to this process and my piece became a sampler of sorts for many of the techniques that Margo was demonstrating for us.
Our time together literally flew by and none of us wanted to pack up and leave.  We all would have gladly stayed for a three day marathon class if we could have!!!
Margo has plans to give a class on creating her wonderful little Fascinator Hats and you can bet that we will all be stalking her blog waiting for the next class announcements!! If you ever have the opportunity to work with this delightful lady, DO NOT HESITATE!!!  You will be so glad that you jumped at any opportunity that arises!!
                                  Here we are as a class showing off our work on our gown fragments.
                             (Susan Elliott is standing on the far left in the pink shirt with the great smile!!!)
Once I got back home I set to wet felting my sampler piece.  If you look back at the area around the large purple flower you can see a border of green wool that had been embellished to the edges of the purple silk.  once the wet felting was done the green wool had shrunk up so much that it was no longer visible and it had pulled the purple silk along with it to form the much more ruffled and blousey flower!!!!


In fact, all of the luscious silk fabrics had been gathered and ruched in along with the shrinking wool!!  What fabulous fun and a delightful set of techniques to apply to all sorts of different projects!!!
                                Thank you so very much for yet another delightful and delicious class Margo!!!

Wednesday, March 21, 2012

Gelatin Mono-Printing at Artful Dimensions Gallery

I have just taught my first class at Artful Dimensions Gallery in Fredericksburg,VA.  It was a small and intimate group but we had such fun and my students generated some incredible mono- prints!!!

This is the general set up for a Gelatin mono- Printing class. each student is given their own gelatin plate- in this case it was an old lunch room tray filled with a slab of Knox gelatin made at a ratio of 8 envelopes of gelatin to 4 cup of water.
Paint is then spread with a brayer onto the hardened gelatin plate and items (called Masks) are placed on top of the painted gelatin to block the transfer of paint to your paper or fabric.
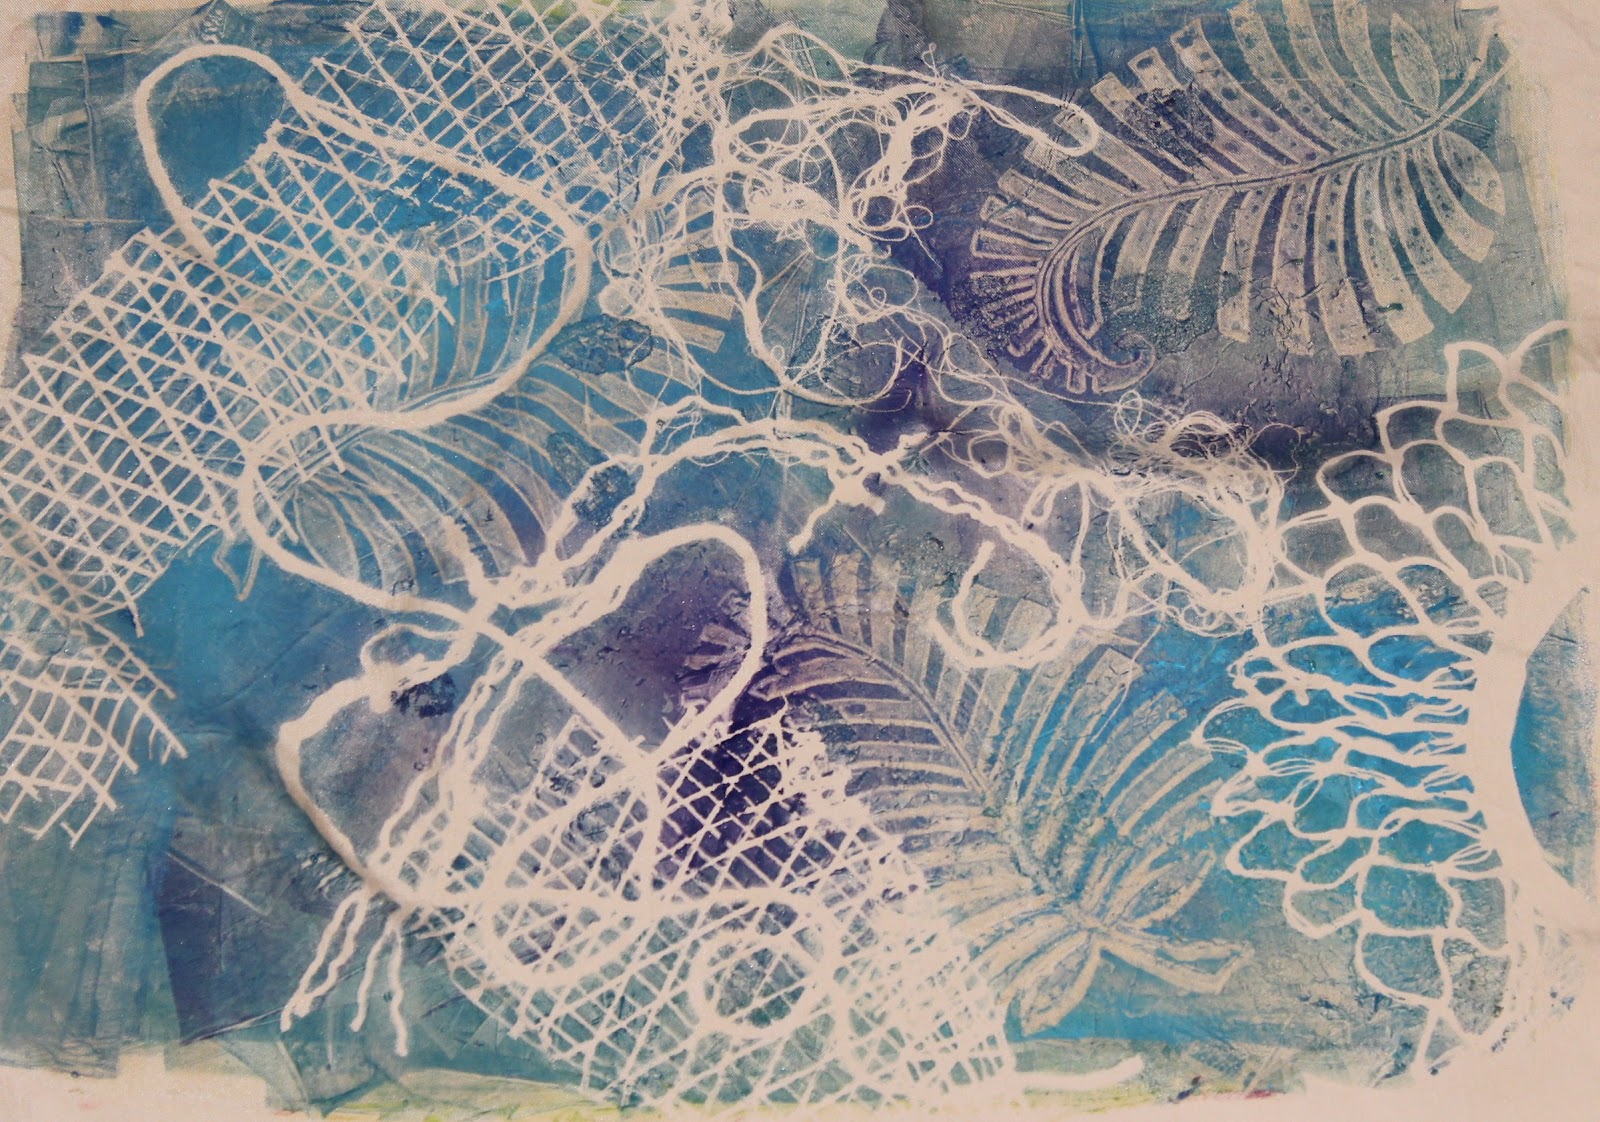
This is the resulting print from a plate that has several colors of paint on it and a variety of masks ( the masks in this case included mesh veggie bags, a wonderful leaf stamp that was used to take paint off the plate- thus leaving the impression of the stamp, some unraveled polyester yarn, a lace doily and some loose threads taken form the edge of a piece of fabric).  This would then be called print #1.
Here is another 1st print done with green and yellow apint on the gel plate.
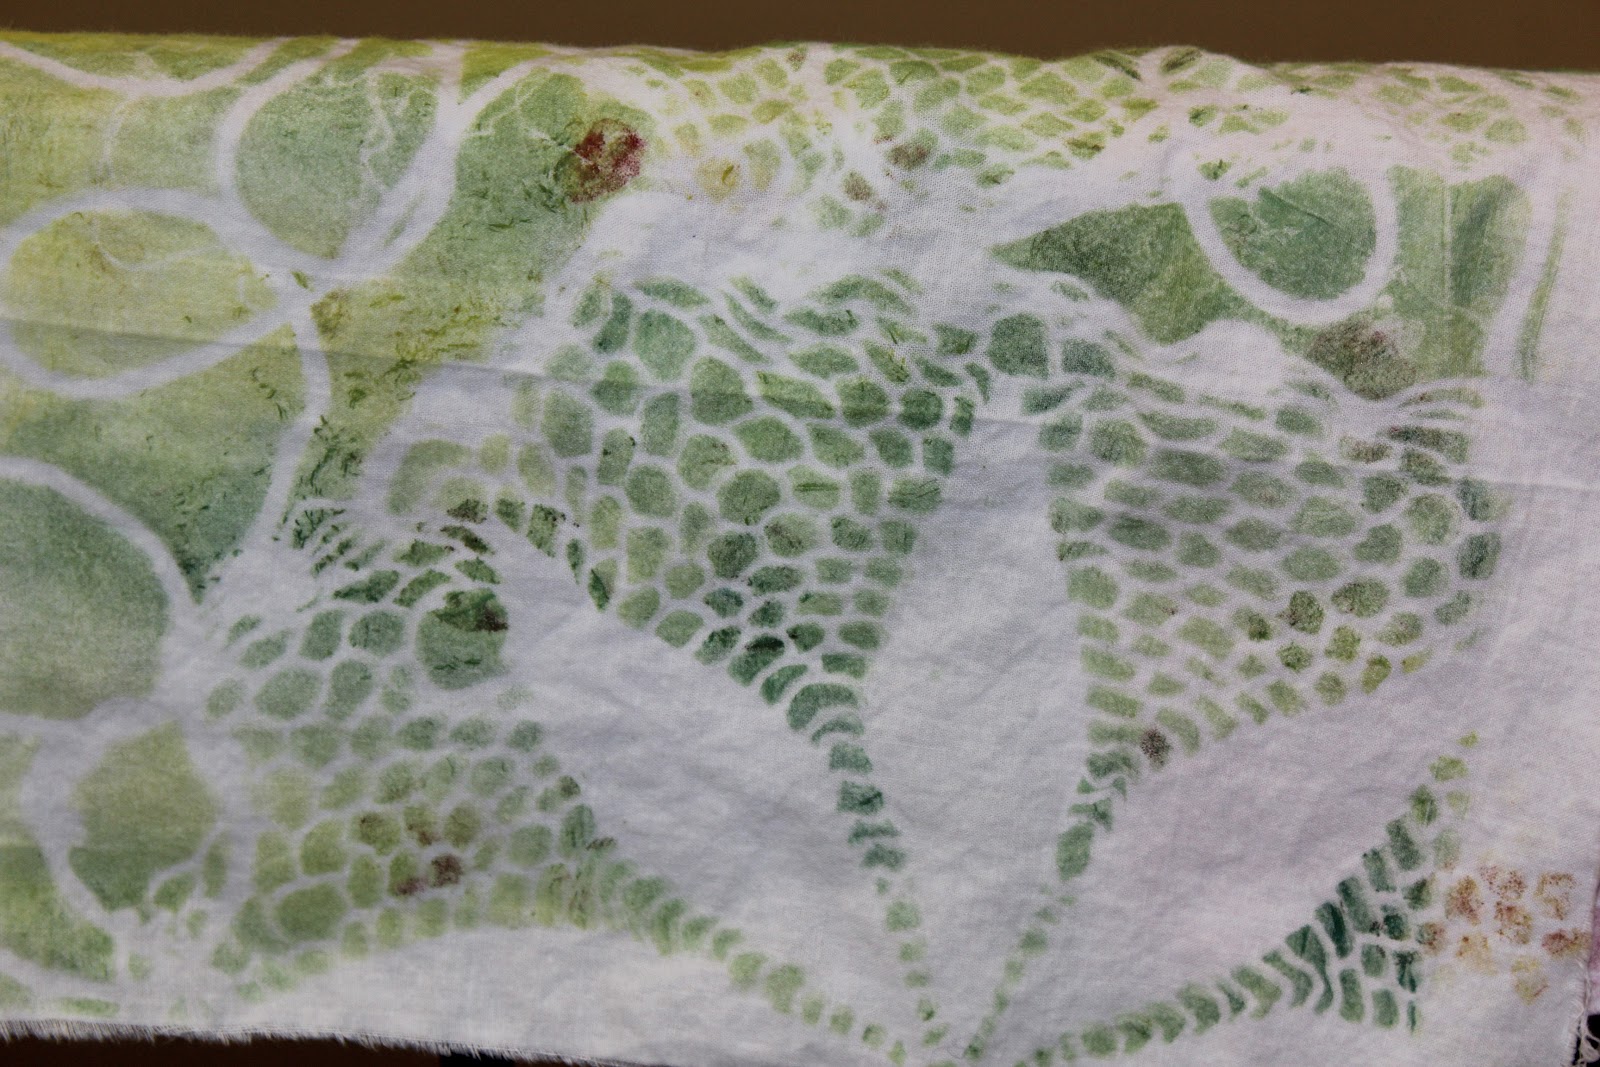
After the 1st print is dry, one can do another print with different colors and different masks.  In this case Lynette cut her own masks from paper and laid them down on the gel pate so some of her patterning from print #1 would be protected by the new masks.  It is always such a fun moment to lift off that second print and see what the results are.  Lots of Oh's and AHHHH's!! Such wonderful fun!
After the first print, and the removal of the masks covering the painted plate, there will be paint left behind on the plate.  A second print can be done at this time and this print is called  a Ghost Print and is often my favorite print.  The Ghost Print is always so very detailed,subtle and elegant.
This is one of my favorite Ghost Prints generated that day.

This is just a  small selection of the mono prints made that day in our three hour class! this is a very addictive technique that requires very few tools and depends on the artists willingness to experiment, get messy and take chances.  Don't begin this project without a big stack of papers and fabrics, either white or colored, to print on as YOU WILL NOT WANT TO STOP!!!!

I will be teaching this workshop again soon at Artful Dimensions BUT I am definitely teaching this class on March 31st at Artistic Artifacts in Alexandria ,Va.  Check here for sign up info!! I would love to see you in class!!

Friday, March 9, 2012

Floral Garden Fantasy!

 This Floral Garden Fantasy hand stitched beaded cuff bracelet has just returned from a National Fine Crafts Show.
 After all of the embellished bead work the cuff measures approximately 2.5 inches and is created over a very flexible and malleable brass cuff blank.
 The design is stitched on Ultra Suede and the cuff is also lined with Ultra Suede.

 I have just listed this piece of unique Wearable art in my Etsy shop and you can find out about all of the details here.
Many ask me how I can keep creating these pieces.  The simple answer is because beading makes me happy!! This piece especially makes me smile!

Wednesday, March 7, 2012

Back From Art and Soul Art Retreat, Virginia Beach


I am just back from another amazing art retreat put on by the wonderful team headed by the indomitable Glenny Moir !  This was an especially important year for the Art and Soul brand as the venue was changed and there were several unknows that go along with such a change.  this year the retreat took place at the Virginia Beach Resort and Convention Center in Virginia Beach.  the venue was wonderful and right on the beach at Hampton Roads.  the staff at the Resort was incredibly helpful and accommodating and the location was terrific.  So enough of the intro , where's the beef?? Here it is!!
(Remember, you can right click on any of the photos to see a larger image!)

First I want to share with you the special apron that I created just for the event.  In past years I have wanted to do an apron like this but time has always been against me.  this year I made time.  I used all of my own surface designed fabrics for this piece, mixing sun prints, rust prints (the owl and gear trivet) and some hand embroidery ( my name in the top right hand corner) one of my hand dyed doilies and some gelatin mono printed fabric.


The apron also served as a walking advertisement  as Judy Gula of Artistic Artifacts was the proprietress of the fabulous on-sight store and she carries both my sun prints and my rust dyed fabrics. ( Several people asked me about the fabrics and I was able to direct them to the store- my rust dyed owl prints sold out during the retreat!! Whoo Hooo!!)

Below you can see several shots of the fabulous displays of treasures that Judy and her design team set up for all of the retreat attendees.

                         The amazing on-site store run by the wonderful team from Artistic Artifacts.
One of the wonderful displays of treasure at the On-site store.

My Rust Printed fabrics on Display at the on site store.
Here is the display of my Rust Dyed fabrics before the shop opened to the public.  Today at noon, Judy and her crew broke down the shop and packed it all up for the return trip to Alexandria.


On Thursday I helped my dear friend Leslie Brier teach her first adventure in teaching at an Art and soul venue.  Her class was titled Mixed Media Robot Assemblages.  She had 11 students and we worked all day taking apart clocks and radios, flashlights and small machines; harvesting parts and building wonderfully whimsical robot creatures.  Leslie was masterful at conveying her techniques and we both worked the room helping with various deconstruction challenges and suggesting various methods for construction.  The atmosphere was inspiring and creative and so much fun!! Below you will see several pictures of robots created by Leslie's students.
A delightful example of a robot created in Leslie's class.  I love everything about this piece!!!
Two  class creatiosn from the Robot class taught by Leslie Brier.

The gorgeous Leslie Brier surrounded by her class of Robot  engineers.
I was also the resident official photographer  for the class and got several great shots of Leslie with her class and their creations.
The view from our classroom windows for the Robot Class and the Resist Dye Class!!  the beach was about 10 feet beyond the windows.  No distraction here!!!!!
This class and my fabulous Resist Dyed Felt class the following day were held in one of the nicest ballrooms in the resort.  this was the view form the huge picture windows.  We were literally 25 feet from the bay beach!!! Heaven even though it was only March!  "When you are lucky enough to be at the beach, you ARE Lucky Enough!!!!"
The next day (Thursday) I had the class that I had been looking forward to all year.  Resist Dyeing on Felted Wool with dye and fiber Artist Extraordinaire Chad Alice Hagan.
A selection of some of the items to be used for clamping and resist along with sample so patterns produced by those pieces.
Here you can see samples of wool felt dyed using various pieces of metal and wood to create dye barriers thus causing wonderful patterns in the wool.  Her is a close up of some of the metal parts that we used.  The black circular disks are vintage rotary phone dials and we have no idea what the other spinney things are, other than Way Cool !
First things first, Chad taught us how to wet felt the needle punched merino wool batts that she provided.  Learned quite a bit at this step alone.  then she described the resist dye process and how we would spend the rest of the day.  First of all, she said that we all had to forget trying to control the patterning in our pieces. This was more difficult for some students than for others!
The newly felted wool, wrapped with rubber bands and ready for the first dye bath.
Here you can see three big bins of undyed felt wrapped with various rubber bands to go into one of three dye baths for 45 minutes.
Chad handled all of the hot dye process to avoid any accidents and to keep things running smoothly with so many students(18).
Felt folded and clamped with various resist pieces and ready to go into dye pot #2.
After the first dye bath the rubber bands were removed and the wool was folded in various ways and clamped between sets of various metal and wooden resist pieces.  We learned that if the wool had not been wet at this point , the resist process would have failed as the water and the clamping are both necessary to keep the dye particles from getting to the wool fibers that are under pressure from the clamped  bits.

Chad as Dye Master and whip cracker- we had to hustle all day to get to the finished product.  A truly terrific experience!
Chad went thru and checked on the clamping process to avoid tangles before she put the whole batch into the boiling dye bath.  Each of us had stitched on small Tyvek number tags so we could identify our pieces.
The sorting of the clamped wool bits after coming out of the steaming dye bath.
When the samples came out of the dye bath, they were placed in the bins and handed out to each student.  At this point all pieces were terribly hot and steaming .  We removed the clamps and resist bits and refolded and reclamped to prep for the next dye bath round in a darker color.
My resist dyed felt pieces.  Wish that you could feel how lusciously silky and soft these bits are!!
Here you can see the wool felt pieces that I created in this terrific class.  I must say that these pictures do not do these fabrics justice.  They are all creamy soft and vibrantly colored and patterned and I cannot wait to stitch and bead them.
One of the very best parts of these retreats aside from learning from fabulous teachers , is connecting again with old friends and making some wonderful new friends!!

Julie Thompson and Jen Crossley meeting in the flesh , for the first time!
Here is a picture of the amazing Julie Thompson and the delightful and wonderful Jen Crossley, all the way from Australia!!! I took a very quick evening class with Jen and had a fabulous time ( pictures to come in my next post) and I managed to see Julie only very briefly while passing in the halls before she had to leave for her home in Arizona.  We did make plans to be in touch on line.  Next time we will be sure to carve out some down time together.  Julie also taught two wonderful classes for 30 very lucky students!!
Judy Gula working the torch and creating enameled beads.
For my next adventure, I was in an enameling class with the awesome Jean van Brederode.  this gal is an amazing teacher.  She has 30+years of experience teaching English to 8th graders and all of that experience has led her to an amazingly organized and information packed teaching style!!  In these classes we , as students, have 6 hours to learn and create, and that time literally fly's by.  Having a teacher as organized and on top of her game at Jean is, is a true joy!! If ever you get the opportunity to take a class from Jean , do not hesitate!!!  Above you see a picture of my pal Judy Gula learning to torch fire some enamel beads.  It took several of us to move Judy away from her store venue and actually relax enough to enjoy a class.  We had such fun together and Judy was able to create a piece of art for herself , for a change!!
Herself at the torch making enameled beads.


Yes, Judy did manage to grab my camera and shot some pics of me working at the torch as well.  I simply had to document Judy doing something other than running the Store- so folks at home would believe that she did take a class.  I guess pay backs really are a B@#$%**!!

My birds nest Bracelet


I enameled each of the beads and disks for this piece and added sari silk and sparkling yarns to fill out the piece.
To top off my retreat experience, I won a Fiskars Craft drill.

I must say that if ever you get the opportunity to attend an Art Retreat, give yourself a gift and GO FOR IT!!  Retreats are amazing experiences that will change your life.  You will be surrounded by creativity of every imaginable sort and you will leave totally inspired and full to the brim with food for your artistic soul.  You will meet wonderful people, connect with on line friends and interact and learn from talented and giving instructors.  Start putting a few dollars away now so when the opportunity arises you can jump in with both feet.
I am very excited to announce that I will be teaching at Art and Soul Portland in October of 2012 and I hope that you all will take a few moments to click on this link and see for your self what these amazing retreats are all about!!

LinkWithin

Related Posts with Thumbnails