Monday, September 30, 2013

Dragonfly Hour- My latest Collage Bead Work

Last week, after teaching a good friend to create a beaded collage cuff, I was inspired to try my hand at a Steam punk version of my own.  As readers of this blog you know that I favor Ocean color palettes and more recently I am working in many bright or Happy Colors. I love vintage bits and I have come to love matte finish Czech beads that have been made available lately.  The matte finish complements the metallic bits and the zipper that I have chosen for this piece.  I am continuing to push myself in new areas and I am very pleased with      the results of this little exercise!

I combined an old watch face and vintage shoe buttons with a heavy duty brass zipper and some tiny keys.  I love the little dragonfly stamping with the ornate detail in the wings!
Here is a peak at how the piece begins with the layout and stitching of the zipper and the first of many decisions necessary for the placement of the larger design elements.

The entire piece is stitched on Ultra Suede and then  mounted and stitched onto an aluminum cuff blank.  I like to use the aluminum blank because it is more mold-able to the wearers wrist and it is quite a bit lighter in weight than a brass blank.  It is also a good deal cheaper than the brass blank and since it is not seen , there is no reason to use a brass blank for this technique.


I used a very old cut metal button, I believe it is Victorian and two reproduction typewriter keys to spell BE. The repro keys are actually from the scrapbooking section of the crafts store. One never knows where one will find the perfect elements for a collage piece like this!!!

Monday, September 23, 2013

My First Solo Show


Do you all feel abandoned ??  Well it is my fault if you do, as I have been very absent from Blogland, all summer.  I have been working at a frenzied pace to create a body of work for my first solo show.  The show opened last Friday night at Artful Dimensions Gallery in Fredericksburg, VA.I am going to post a bunch of pictures of the pieces in my show and try to keep the words to a minimum.  Of course if you have any questions please do let me know!! I hope that everyone has had a wonderful summer! I for one am really looking forward to our wonderful Virginia fall season!
 So now On With The Show!!
I made little scrap quilt legend surrounds for each of the large wall pieces and the  collage necklaces.  I wanted the titles to stand out and be something very different from the usual gallery tagging system. Here you can see Hydrangea- done with my sun prints and hand dyed fabrics.  Free motion machine embroidery followed by some subtle beading finished off this piece.
The piece on the left is titled Purple Ferns and is also done with my own sun prints and hand dyes.


The top piece in this picture is titled Cape Sunset and it was done using my embellishing machine and then wet felted.  I used merino roving and silk waste and then added 5 tiny little shells and some free motion embroidery to bump up the texture and add a bit more interest.  I backed the piece with a glorious bit of deep purple silk velvet.

The piece at the bottom is titled Tide Pool I and is a quilted piece that was mounted on wood bricks and embellished with beads stones , lace, embroidery and found objects.  This piece can be wall mounted or sit on a table top as I affixed chunky rubber feet to the bottom of the wood tray.  When siting horizontally one gets a completely different view of the details that are not visible when it hangs on a wall.  Kind of like two pieces of quilt sculpture in one!


The top piece is titled Poppy Fields (SOLD) and was needle felted with many different fibers and textiles, then free motion embroidered and beaded.  All along the bottom of the piece I added drizzle stitch grass to add a very realistic look to the piece. I mounted (stitched) the piece on a lovely soft green linen fabric. ( This was the first piece to sell on Friday night!! :)
The lower piece is called Energy.  I created it using my Embellisher and then did some wet felting as well, combining wool roving, silk fabrics and silk roving.  I further embellished the piece with hand stitching and bead work.  This piece is put together in the same fashion as Tide Pool I, each mini quilt mounted on wood blocks of different sizes and thicknesses.  It can also sit horizontally on a table top or shelf .


Tide Pool II was supposed to be part of Tide Pool I but as a result of all of the beading ,found objects and stitching, it crowded the other pieces too much . It became a piece all on it's own.  A friend at the gallery titled it the "Butter Dish" as it reminded her of her mother's fifties style butter dish.  I had to admit that the shape was similar and in my mind it will always have a nickname of the Butter Dish.!  I mounted it on a smooth piece of found driftwood and affixed the same rubber feet to the bottom.


Detail shot of "the butter dish"


 I created some of the sea life for my Tide Pool pieces using recycled glass beads from Africa that my brother sent to me , and some seed beads.  I stitched the seed beads thru the large holes in the glass beads and into a very small square of ultra suede.  then I was able to stitch the ultra suede wherever I needed to put it on the quilted sculpture.


more detail shots of portions of the Tide Pool sculptures


I created two purses for the show in very different styles and using very different methods but always using very Happy colors! the shoulder bag above is fully lined with two pockets, hand made cording that was braided and then stitched to some hand dyed cotton.  the straps are held on with covered buttons that have felted and beaded tops. The collage felting was done with silk fabrics, wool roving , silk waste and vintage hand dyed doilies that i dyed myself.  It is embellished with hand stitch and beading.


This purse is call the Colors of Happy Purse(SOLD)and is a stitched collage of my sun prints and hand dyes.  I added hand made fabric paper beads that are resin coated and hand made cording that was then braided.  Again the strap is attached to the purse with covered buttons.  It is lined with several sun prints and has two pockets inside.

This collage necklace is titled Jubilation. The chain is various styles of copper links and the majority of the beads are fabric embellished with seed beads as well as fabric paper with resin coating.  The heart at the bottom is a resin  collage piece with a rhinestone and the leaf shaped piece is a resin coated piece of my sun printed fabric.
These are my Sun Print Spinner quilts. Each segment is double sided, hand stitched with metallic thread or beaded with glittery beads.  The intent is for the thread and beads to sparkle as they catch the light as the quilts spin.

Smiling Faces is a woven quilt that is heavily embellished with hand stitch and beads.  I painted the focal image of the pansies using water color pencils.


Solar Flair is a mixed media quilt combining my sun prints , fabric paper including a lace layer , lots of hand stitch and beading.  I also added free motion stitching and machine quilting to various parts of the piece.


Felt Collage Pillows 


Beaded Tapestry Earrings


Meadow Lace(SOLD) is the last art quilt that I created for this show. I combined a rust dyed and screen printed vintage doily with a lace sun print and lots of hand stitched Queen Anne's Lace covered with literally 100's of french knots.

Well that's a wrap for this show, at least 75% of it.  Remember if you want to see close ups click on each picture for a larger view.
Now I am working on my next show which is due to be hung in mid October at a local branch of the area library.  The England Run Library is brand new and is a glorious ,certified Green building. It is  a real treat to be invited to show my work there.  I have several more large wall pieces to create between now and then to fill the space.   So back to the sun prints and hand dyes with a few beads thrown in, of course!!!!  


Monday, June 3, 2013

Busy, Busy, Busy!!!!!!!!

Some things tend to get pushed off the plate when one gets super busy and I have found that computer time and writing blog posts and visiting all of my glorious friends blogs has been one f those things!!  I have truly missed the blog hopping and visiting and as I sat down today to finally write a new post I was a bit shocked to see that I have not updated you since April 6!!  That is inexcusable!!
So as evidence to show that I have been truly busy I am going to share a quick photo tour of what I have been doing art wise. Of course there has also been family stuff, house stuff, the garden, taking care of all the PR for our gallery- Artful Dimensions.  BTW we would love it if you would check out the gallery on FB and "Friend us" if you are so inclined!! Here is the link.
As many of you know I have been experimenting with felting and combining harvested silk gauze and wool roving to make unique wraps of wearable art.  Here are a few of my latest creations!!


( Click on any picture to enlarge.)
 This is my latest piece.  I am calling this wrap Peaches and Cream.  I put it all together using ultra soft merino top roving , silk fibers, and some Rusty Nail Angelina fibers sprinkled in for a bit of sparkle.


As part of the felting process I have added in clusters of silk flower "blossoms", made from some of the fabric and rolled and attached solely through the magic of the wool fibers.

Some of the silk fabrics have shots of metallic gold threads running through them, perhaps you can see the shimmer in the upper left.  This will be on display and for sale at Artful Dimensions Gallery of Art and Fine Craft.

I have finished  a new free form beaded collage bracelet as a commission for a good friend who owns a wonderful knitting shop on Cape Cod.  ( If any of you vacation on the Cape and are out on the Outer Cape- Orleans area- plan on stopping by and checking out the wonderful offerings of yarn and great hospitality at A Stitch In Thyme.)
 My friend wears lots of soft blues and green tones, quiet earth tones you might say.  So I had a grand time sorting through my bead stash to find the perfect beads for her bracelet.  the closure is made using a loop of seed beads and a vintage mother of pearl button.
 In this bead soup you can see beads made from porcelain, some Picasso Jasper dagger shaped beads ( a bit left of center with the brown veins), a glass face bead, several recycled glass beads from Tanzania, and lots of different seed beads.
She should have received the bracelet by now and I hope that she likes it!!

Here are some other felting projects that are on their way to becoming pillows.  Each will have a flange around the outside- kind of like a ruffle but NOT ruffled, so as not to loose the wonderful organic edge of each piece.

 After taking a wonderful class with the AMAZING Margo Duke, I learned how to add fabric roses, ruffled and pleated silks and gauze fabrics and how to incorporate some of my hand dyed vintage crochet pieces into the felt work.


         After the felting process comes the even more fun part, the beading and hand stitch work!!!


This purple piece is on it's way to becoming a very special pillow for a special friend.  The others will become part of my first ever Featured Artist Show to be held during the month of September at Artful Dimensions.

I made this quick little bracelet for a special visitor who will be coming very soon!!! This specific pattern is called Tapestry and was created by the amazing Carol Cavanaugh of Beads On Parade a wonderful bead store in Fredericksburg, VA.  The pattern calls for using two different colors in several sizes of beads but, as you can see, I modified it just a bit!!


          I have also been working on curriculum development for a new Class that we are offering as a camp this summer at ADG. (Artful Dimensions Gallery)  A good friend Barb Posey, and I are offering a Fairy and Troll camp for all ages 10 and up.  We will be creating our own fairies and trolls and then working with found and natural objects to make environments for those little people to live in.  We are very excited about it and I have really gotten into making little accouterments for the fairies!

 This little baby fairy is based on instructions offered in a wonderful book by artist Sally Mayvor.  I discovered Sally's wonderful work from a listing on Pinterest.  I have since learned that she lives on Cape Cod- where I used to live and where I still have family.  She is a very gifted artist and shares all of her techniques.  If you are at all interested in crafting your won fairies with very simple supplies check out her book Felted Wee Folk.
 Here is the little guy hanging out with his new pal Mr. Cicada.  We are currently in the midst of a 17 year swarm hatch and the buggers are everywhere!!

                       This is our sample of a troll for those who do not wish to create fairies.


 Here is baby fairy with his Momma seated in their little moss and bark floored environment, in front of her mosaic table and serving up a polymer clay strawberry cream cake and tea in blue ceramic mugs!!


A better shot f Mr. Troll with his bones and his fish bone stool.  I\did his dreads  ( hair do) with brown wool roving and twisted it quite a bit to get the right look.


Here is a detail shot of the mosaic table- I used molding paste and little broken shell bits to craft the table and polymer clay for the other bits!!
 We have had quite a few adults inquire about the camp and we have decided to offer some classes for adults as well.  We had a nice write up in the local paper last week about our classes so hopefully folks will really follow through and sign up!!

So as you can see I have been working very hard and I will try more diligently to keep you up to date on my creative projects in a more timely manner! I hope that wherever you are the cicadas are not driving you nuts, the tornadoes have avoided you and you can find cool or warm place to create beautiful works of art of whatever type you choose!! ART ON!!!

Saturday, April 6, 2013

This, That and a Sprinkle of Something Else

I have been felling a real Need to Bead lately, so I have been feeding the need.  Here you can see my first go at a Cellini Spiral.  This is a tubular spiral peyote stitch design.  I have been interested in working on this spiral for a long time and I am planning to create a short choker style necklace with this pattern.  The purple beads on the outside of this spiral are a size 8 and the inner spiral beads in black and white are a size 15- teeny tiny!  By working from very small to quite large one can achieve the undulating spiral shape.
although it looks a bit complex it is actually quite simple once you get going.
 These next two pieces are now for sale at Artful Dimensions Gallery in Fredericksburg, VA.  This first piece is a bracelet that I have titled Sea Spray and again, despite its complex shape, it is very easy to achieve using extreme increases in each row of beading to achieve the wonderful ruffly effect.

 This bracelet is titled Cherry Blossom Fizz.


This next piece is the beginnings of a felted picture collage for my upcoming show in September. This  is the piece so far after the wet felting step.  It is a beach scene from Cape Cod .  It will have lots of stitching and details added with machine and hand stitch and probably some beads.


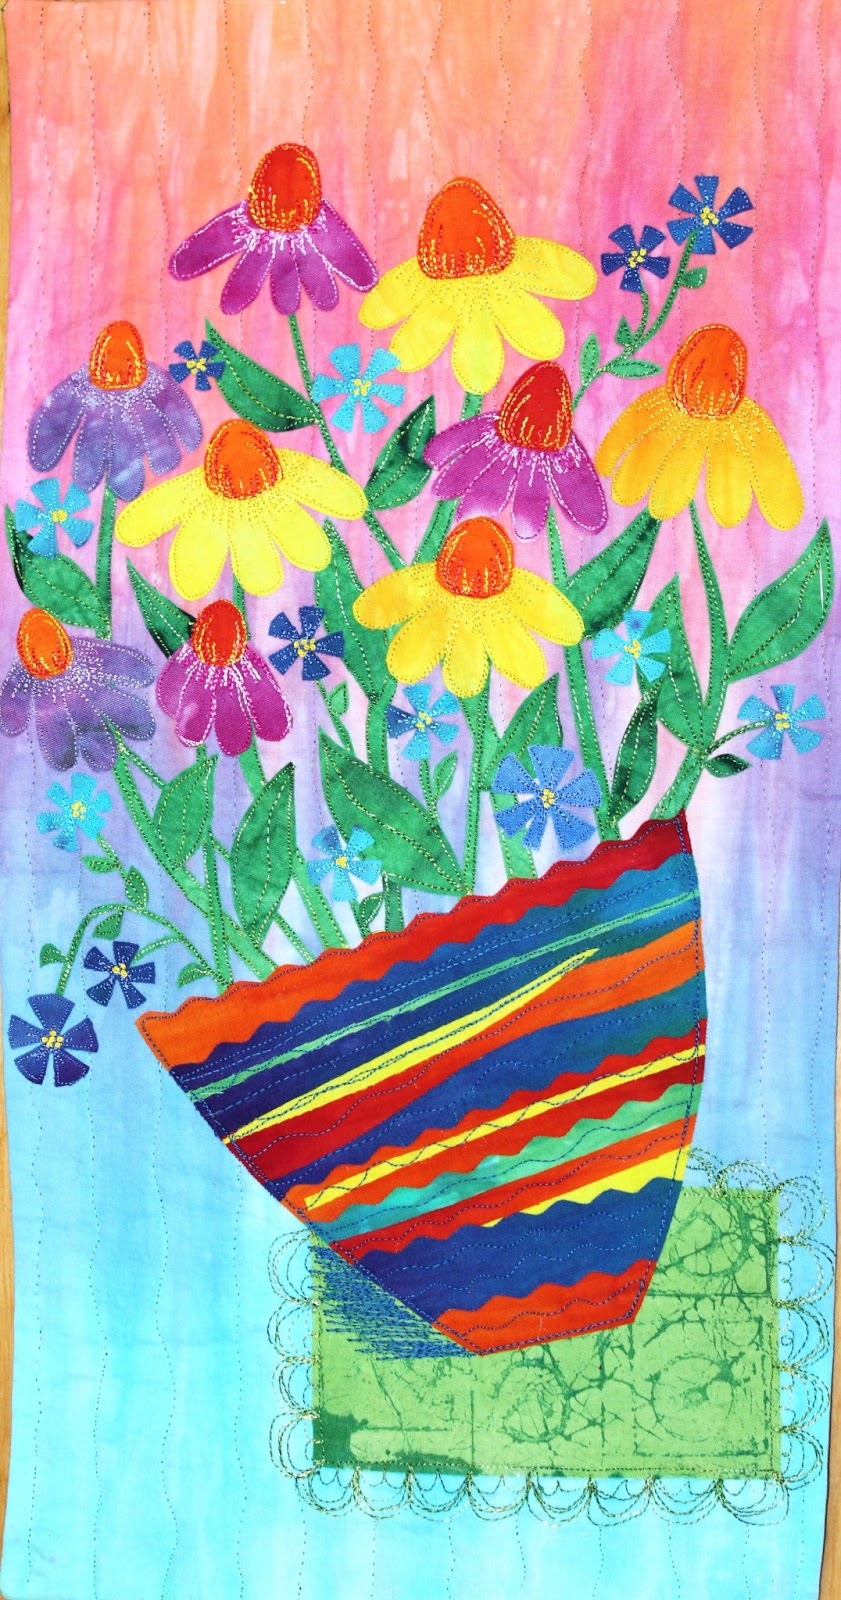
 It is done entirely with my hand dyed fabrics and I added quite a bit of thread painting to the cone flowers  and to put an edge on the table cloth.

And last but not least, for this post anyway is a newly collaged ,wet felted scarf made with various bits of silk ,wool and mohair curls, and roses that were created during the wet felting process.  For this piece I used several of the techniques that I learned with Margo Duke .  You can read about that class and see pictures of my work in the previous post, here.

I am in the process of adding beads to the centers of the flowers and some sparkle to the bits of green wool curls.  I have several more pieces like this one planned so I must get going to get them ready to roll!  Till next time....................

Thursday, March 28, 2013

Ruffles and Flounces with Her Majesty Margo


Let me start by saying that if you have any interest in felting, fibers, Textile collage or texture and you get the opportunity to take a workshop with Margo Duke JUMP AT THE CHANCE!!!!   She has earned her Title of Her Majesty!!  Her work is stunning and innovative and luxurious and she loves to share all of her tips and tricks as she is secure in the Knowledge that no one can collage fibers and fabrics exactly like another person.  She is a total delight.  Ruffles and Flounces was my fourth workshop with Margo and this class was held at the fabulous space and shop for Altered art and Fabulous batik fabric, Artistic Artifacts.
Whenever we gather with Margo, she brings out her glorious samples and inevitably we all get caught up in asking how and what and exclaiming and drooling over each piece.  This little tease of a trunk show is well worth the cost of the workshop, but wait there is more!!!  Then we see garments and my friend Chris is asked to model the garments so we can see the fit of each!! Then the pieces are passed around and finally they are counted to make sure they have not sprouted little furry feet.  ( just kidding about the last bit)


I took several photos fo a couple of her samples . These pieces are done with wool roving and collaged with silk fabrics, lace doilies, yarns and other fibers.  All of the work that you will see here are achieved using water, a bit of soap and woman power.  No stitches were taken to create these pieces!!!!


The Texture is totally breathtaking!!  The little red berry like bits are called wool nepps.  They are a bi- product of not good shearing.  The bits from bad shearing practice are called second cuts, by spinners.  This happens when the shearer does not get as close to the skin and therefore the longest fiber form the animal and has to return to make a Second Cut to even out the sheep's wool appearance.  this second cut ends up as lost part of the best part of the fleece, at least it was till some bright person figured out how to make these Nepps.  They can be dyed any color and they give wonderful texture , as you can see!


The first garment that Chris modeled was this wonderful vest.


Margo explained how she makes her collaged felt two sided so the garments can have interest on the inside as well as the outside.  FABULOUS!!

.
 
The next garment was a wonderful soft colored jacket.  


This back view gives a great idea of how collaged Margo's pieces are- remember this is all done with water, a bit of soap and lots of hand  manipulation.  Then the pieces of felt collage are stitched together to make the garment.

( Click on any of these pictures to see enlargements and more detail)

I started out my project with a piece of green silk gauze with pink roses on it and a piece of tan cotton gauze that had red and blue floral print.  These remnants were topped by a large piece of chartreuse green pre-felt.  you can see the pre-felt in the picture above along the bottom edge.  I then layered the green pre-felt with hand dyed vintage cotton doilies, silk hankies, silk fibers and silk gauze  fabrics, sari silk ribbons and fun yarns.  Some of the silk gauze was rolled into 3-d rose shapes.  You can see the rose shapes in the center left of the above picture and in the middle of the picture below.
These two pictures were taken before the piece was wet down with soapy water and rolled and rolled and rolled some more!!!
This is a picture of the fully felted and fulled collage!  It shrank by 30%.  Along the bottom edge you can see the silk ruffle that was created by capturing one edge of a long piece of silk gauze ( cut from a thrift store skirt) .  As the wool shrinks that has penetrated the silk fabric, the silk gets carried along with the wool, resulting in wonderful ruffles and flounces.

  At the top of this picture you can see the felted in cotton doily- look at the wonderful texture- I do so love it!!!  The base of the silk roses have been captured by the wool and drawn in more tightly and are secured.


The br
ight blue areas in this picture show the pleating that I accomplished by hand pleating the fabric when wet and then covering with a very wispy bit of wool roving before the rolling process.


Here you can also see a good view of the ruffled silk from the pink skirt.


Here is a shot of the almost finished collage piece.  Just below the green pre-flet area you can see a piece of bright blue silk with a beaded motif on it.  This bit was cut from a silk beaded blouse, again from a thrift store.

now here is the same area once the felting and fulling is complete.  the beading is there along with the wonderfully puckered blue silk fabric.  So fabrics that have been beaded and sequined can be used to add yet another element to the felted collaged piece.  No needle and thread required!!!

Here you can see the back of half of the piece,  the half with the green silk gauze.  You can see how the green pre-felt fibers have penetrated the silk gauze.

This is the other side of the back , the half with the tan floral cotton gauze.  I love all of that texture!!!!

As you can probably tell I am more than a bit excited about  the possibilities for all of these wonderful
techniques!!  You will definitely be seeing more of this type of work here very very soon!!

So if you ever see classes, workshops or lectures offered by Her Majesty Margo Duke, DO NOT HESITATE TO SIGN UP AND DIVE IN!!!


LinkWithin

Related Posts with Thumbnails