Thursday, December 27, 2007

Last Minute Gifts

I hope that everyone has had a wonderful holiday- Christams , Hannukah, Eid!! I spent yesterday picking up and planning my next projects . I am thinking about things that I want to do as opposed to projects to work on for sale. i really love this time of year as it is my true play time! the garden is not calling as everything is asleep, the kids are well occupied with friends and their own projects and once I get my art space straightened out , I can dive in to some new ideas and projects!!
I did want to share some projects that i POWER CREATED just before Christams. These gifts were so press off the sewing machine that they were still smoking as I wrapped them!!

I have just stuck my toe into the fabric creating waters using a wonderful new fusible web called Misty Fuse. This stuff is awesome- I love it!! It has been advertised in my two favorite magazines CPS and Quilting Arts for a long time and many of my Art group friends use it often. Now was my turn.!!!

This padfolio is designed to hold an Office tablet of lined paper and has an inside slash pocket for storing loose papers. Below I have provided the steps that I used for putting this project together.

My materials were:

background fabric from my stash, dismembered silk flowers, painted drier sheets, stamped fusible web, dyed cheesecloth, rayon thread for decorative stitching, fusible Timtex(Ultra heavy stabilizer) sewing machine with zig-zag stitch, parchment paper , tuille, iron and ironing board..

Here is my starting pile. I painted the drier sheets with Lumiere paints. Sometimes I used several colors on one sheet and I did not saturate the sheets with colors- I left open white areas. i also ripped the sheets into smaller pieces.

I stamped some images- again using Lumiere paints - onto some fusible web that had a paper backing and let the images dry thoroughly.

You can see here-hopefully- how gossamer fine this Misty Fuse wb is! The first thing that I did was fuse the web to my background fabric.

Then I went about placing my blossoms and painted drier sheet bits werever I wanted them to be. I simply collaged them . When I found an arrangement that was pleasing, I put down the parchment paper over the top and fused everything down with the iron. Then I move on to the next section. I started in one corner and the collage grew from there. For the stamped images, I peeled off the paper backing and placed the web with image down on top of the collage and heated the whole thing again. In this photo you can see the fern image just to the right of the two orange flowers.

This was the sheet once all had been fused to the background fabric.

Next I covered the piece with fine white tuille. You can see the pile of tuille on the left. I pinned everything down really well and went to the sewing machine.

I used various colors of threads and stitched centers in all of the flowers to resemble stamens. i stitched along many of the fern images in green threads and I did lots of Free Motion Embroidery (FME) all over the place to secure everything together. It is difficult to see lots of the stitching at once so I took several photos.

Here you can see the stitched flower stamens and the painted cheesecloth that I added to the left of the purple flowers.

It is easiest to see all of the stitching from the backside of the piece! The stitching adds a wonderful additional layer of texture to the whole project.

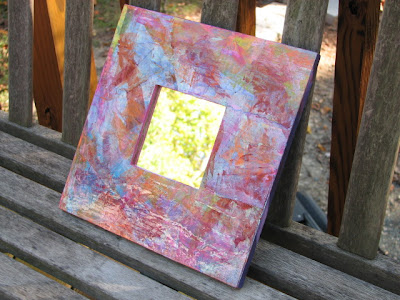
Once the stitching was complete. I cut the fabric up and fused it to the Timtex(heavy stabiliser). I then fused identical size pieces of interior fabric to the other side of the timtex and satin stitched the perimeter of each piece. Here you cn see the final padfolio with the interior fabric that I used. I made some cording out of coordinating ribons and yarn to use to tie the padfolio closed and tacked it to one seam. I created a button out of a scrap of the fabric/Timtex?lining sandwich and sewed it to the front with a green bead.

Here you can see the cording and the Button Closure. As an extr little giftee I amde a book mark out of another scrap of fabric, sme beads and a giant paper clip. (available at Staples). I made a poccket of the fabric sraps, stitched around it on three sides and glued the clip into the pocket with Fabri-tac. Then I added the beads and extra cording tails as embellishments.

I am really pleased with this project and I know that I wil be making many more as gifts!! I have also asked several friends to save their used drier sheets for me! They just look at me, role their eyes and give me a hug!! They are beginning to understand and my art friends want me to teach a class for this project!!!!

It is going to be a great Arting year!!!!

Wednesday, December 19, 2007

Rusted fabric

I have wanted to try this technique for "dyeing " fabric for awhile. Then when a recent CPS magazine came out with Lesley Riley's rusted fabric projects on the cover I jumped in. I scurried around and set up three experiments and tucked them away where they would not be disturbed. I was to leave them alone for two or three days...... Well, I promtly forgot about them! ( I am sure that none of you have ever done this , I thought not!!! LOL!!)

The other day, while digging around for some trims for another project, I unearthed my rusting project. If you could see my art space right now you would understand why I use the verb unearth!!!!

Here they are!!

This piece was done on plain white muslin using vinegar and water to induce the rusting process. I wrapped the fabric around an iron rack that I had purchased at a Thrift store for $1.I am going to use this piece in an Art Quilt and I plan to make more pieces!!

For this piece I took a series of three iron washers and wrapped them up in a strip of muslin. This is also going to be used for some sort of fabric collage piece.

This piece was done using a iron frame for a tile trivet. I think that this must have scome from a Thrift store as well, at some point. I am in the process of making sketches for each of these rusted pieces. I have come up with some exciting initial ideas. We will see how they turn out! Stay tuned!!

Friday, December 14, 2007

A Gift Cone- A Case Where Giving Was Such Fun!!!!

My wonderful and fabulously creative friend, Ruth Rae, had a fantastic article in the special publication Quilting Arts Gifts. ( The magazine is still available on some newstands!) She described how to create wonderful fabric and paper Gift Giving Cones. (You can access Ruth Blog thru the list to the right of this column.) This is an example of a gift were the container or vessel holding the gift could serve as the gift itself. Of course Ruth presented the directions and example in her own glorious style and I knew immediately that this was a process that I was going to enjoy!

I created a cone to hold a special Bird that I had created for my friend Karen's birthday.

The back.

This is the sort of peice where anything goes, the more texture and little surprises the better. The back is equally as important as the front and the top portion of the interior is very visible once the gift inside has been removed. There are many different surfaces and angles to keep in mind with this project.!!

The front detail.

I used white felt as the interior core and then layered on cheesecloth, organza, tulle and silk, sheet music and text from vintage books. I stitched pockets to tuck vintage buttons into and added amny different bits of vintage lace and trim. The center focal point is a vintage rhinestone shoe clip and then vintage mother of pearl buttons complete the closure down the front. The bootom is finished off with a vintage prism from an old chandalier.

The front interior.

After pinning all of the layers together, I went crazy with the machine stitching and practiced my free motion embroidery stitching to add even more texture!

Here is the special littl Wing Ding that was tucked inside!

This was a wonderfully fun project and I so enjoyed presenting it to Karen! I was so proud to give this gift and she was overwhelmed to receive it! This was definately a case where it was more fun to give than to receive!!!!!

Tuesday, December 11, 2007

Sorry to have been away for so long!!

I have survived my two show weekend!! The first event was at my dear friend Karen's house. I was included with a great group of 5 other artists. Karen graciously opened her home to the public for our sale. I was very pleased with how I did, sale wise and I had a fabulous time meeting and talking with all sorts of neat people!

I had several very new peices of work with me and I was sort of hesitant about trying to sell them. I loved them both but I was not confident that they were "good enough'. Ever been there???

Well both of them sold!! I decided to put a high price on the large peice as I would not have been at all upset if it had not sold- but a wonderful gal, who happened to be a music teacher, snatched it up and declared that she must have it. It is such an amazing gift to be able to experience another person's connection and joy to something that I have created!!

Here is the peice that she bought. It is 17x22 and I did it on canvas board.

It is difficutlt to catch all of the details of this peice in a photograph. The bird is cut from collaged sheet music that was then washed with gesso. I used oil pastels to add in the details. The background is paint scraped and then I added layers of glases, some stamping with gold, some sheet music and tissue paper that I had written on. After adding the phrase, I doodled on the tree and leaves. Karens glorious red walls served as a wonderful background for our display! Maybe I can convince my husband to paint our diningroom that color- tho she said that it took 5 !!!! coats of paint!!!!!!

Here are some other pictures of my work at the show.

I sold 6 of my birds!! People either thought that they were really weird or they loved them and had to have one! One gal bought two of them!!

I made the mirror in this picture that same way that I described the canvas board piece and I sold quite a few of my ornaments form the tree.

This piece is 8x10 and it sold as well!

I love this mirro and I am just as glad that no one bought it! I put down cheesecloth and then painted it with gesso and then applyed color in washes. THere is alot of texture in this piece that is not shown very well in the photo. THse are three beautiful Cape Cod scallops on the front.

The good news about not selling out is, now I can shop from my stock for all of my personal Christmas presents for friends and family!!

Friday, November 30, 2007

New Bird Creations

It has been a long time since my last post. I have been very busy getting an order together for a gallery that has taken quite a liking to my Wing Dings. In fact the first batch that I delivered has sold out!!! WHOOOO HOOOOO!!! I had set aside a chunk of time to work on items for two upcoming shows and I had not plannned on an additional order for Garden Fairies and Birds from the gallery. Mind you, I am not complaining one bit, I have just been very very busy!!!
Here are my new birds. I will post more photos of finished items as soon as I can get them finished!!! Right now everything seems to be in some sort of state of not quite doneness!! I must make a list or two and figure out where everything stands!!


This Wing Ding is going to remain in the family collection! I am not sure how many tree cookie press dies I am going to come across!!


The next two are also made from aluminum plates from an old cookie press. I painted the plates and then overstamped them for some more texture.

"Sing Your Own Song"


"Let Yourself Soar"


I made the next two birds using vintage drink coasters. They came with the flowers on them and all of the wonderful dings and scratches! I just love them and they will make perfect gifts for Bird Loving Gardeners!!


The phrase on each bird says,"Find the seed at the bottom of your heart and bring forth a flower."


This bird is made using the bottom of a soda can. the rim gives me some room to add a small collage. I created a very small nest from honeysuckle vine and yarn and added a tiny round white beach pebble for an egg. The phrase says "Nourish Your Soul".


This bird was made with wings cut from copper flashing and then embossed and flamed for color. The body is a tart tin and the legs are from a vintage typewriter.

I have had several requests to have birds at my upcoming shows on the 8th and 9th , so there is nothing for it but to get back to work!!!!!

Saturday, November 24, 2007

Pay It Forward!!!

I Love the idea of Pay It Forward!! I have just found out about this art version from my dear friend Patty, On her Blog Magpie's Nest ( http://bitze.wordpress.com/ ), she found out about it on Belinda Schneider's Blog ( http://belindaschneider.wordpress.com/ ). We all know that if Belinda is involved , it is a Very Good Thing!!! Here is how it works:

I will send a handmade gift to the first 3 people who leave a comment on my blog requesting to join this PIF (Pay it forward) exchange. I don’t know what that gift will be yet and you may not receive it tomorrow or next week, but you will receive it within 365 days, that is my promise! The only thing you have to do in return is to pay it forward by making the same promise on your blog.So basically, if you’re one of the first 3 comments, I’ll send you something crafty that I’ll make!Once you sign up, copy and paste the above paragraph on your blog, and three other lucky people will be recipients of your handmade work. Pay it Forward!

By the way, if youhave not seen the movie Pay It Forward, it is a must see!! Just be sure that you have a box of tissues handy!!
Come and join me for this fun arting event!!

Monday, November 19, 2007

Ashes of Roses


I don't remember if it was a lipstick color or a blush name, but I am pretty sure that it was from the cosmetic industry, my Mom use to have some product by the name Ashes of Roses. I know that there is a novel by this name. Anyway, my Belinda's Dream Rose has given me her last bloom for this year. She bloomed steadily and very profusely in the Spring, slowed down a bit when it was very hot and then as soon as it started to cool down she came on like gang busters again!! We have had several frosts, the impatiens succumbed weeks ago but Belinda has kept right on blooming!! I do so wish that our computers had Small-a-Sensors as her fragrance is amazing as well! Becca and I love her evena s she is losing her petals all over the kitchen table!!
I know taht she will return even more floriferous and fragrant after a long winter's anpbut we will miss her!!! You can bet that you will hear me shouting from the rooftops when we pick our first bloom of 2008! I must remind myself that Spring would be nearly so fabulous an occurence if there was no Winter to spend in anticipation!!

Saturday, November 17, 2007

It's a dog's life !! (Part Deux)

100% cotton sheets, 100% wool blanket, Down Comforter, hugs from a sweet 10 year old. What dog could ask for more!!!
Buddy puts up with SOOOOO much!!
now don't go rushing off to call the ASPCA on me!! :)

Friday, November 16, 2007

Finally Done!!

A miracle of infintesimal proportions ( when compared to World Peace or something else important) has occured! I have finished up some projects!! But not, however, before I had started a new one- more on that later!! There is no denying it, this is just how I work!!

These stocking ornaments are for an Ornament Swap on one of my Yahoo Groups. I dyed some white baby socks with coffee 9for thatVintage look- ha ha!) and some with Red Rit dye. I used truely vintage trims and hand dyed cheese cloth and beads and tiny jingle bells to decorate them and put a Chick charm on each one, they were quick and easy! on the red ones I use some really neat lime green tiny ball fringe- it shows up here as more of a yellow but it really is a nice different green.

It was suggested to me at the GRACE Gallery in Reston that my Garden Fairies would make neat pins. So I tried some. I have made some modifications as to how I do the faces. I paint the fabric before sewing and then draw my own faces once the piece is sewn and turned. These are very cute but not easy! Smaller is often much more difficult- now I have to figure out pricing!! iIhave put a small pin back on each taht also has a bale on it . This will allow the piece to hang on a necklace as well!

This picture gives you an idea of how much smaller the pin doll is when compared to the regular Garden Fairy.

After receiving my copy of Quilting Arts Gifts, I got all inspired to make some more fabric paper. i m working on a Christmas Stocking for my AWOL Yahoo Group and I wanted to make it out of fabric paper. I love this technique as it is so messy and all collage work. I use my painted paper towels, wrapping paper, decorative napkin tops, text from old and foreign books and tissue paper, all fused to fabric with white glue. I literally spent several very enjoyable halves of days working on several very large sheets (yards) of this stuff, so now I have lots to be used for creating!!!

Each hanging is approximatly 3 x 4.5 inches. only the fronts have bird images but the backs are decorated as well. I sewed each piece together on the machine, sometimes adding thread painting around the nests and some have tulle pockets with treasures sewn inside.

In this piece you can also see that I used dressmakers pattern tissue for the collage work. These hangings definately have a Holiday flavor to them but they can also be left to hang all year round. i put eyelets in at the top corners and in the bottom middle. Then I played around with adding the dangly bits. I love the danglies!! Most of the items that I added are bits of old jewelry, vintage lamp prisms and old pearls.

In this hanging you can see the little tulle pocket with fibers and pearls placed inside. Thank you Ruth Rae, for that inspiration!!!!

I have 6-8 more of these to finish and I have a feeling that they will sell very well at my show- at least I hope so!!

Well, the natives are clamoring for food! What's up with That????

I'll be back later with some more photos of completed photos!!

Thursday, November 15, 2007

Do You Ever Feel Like.......

a puppy chasing it's own tail??? Lately, I feel like I have been spinning in circles happily playing in my art space, moving from one project to the next and getting nothing done!!!!!! I get a new idea, get all charged up about it with more ideas than my mind can handle and I go charging off to start it. Meanwhile, I have various other things going in all sorts of degrees of "Doneness" and now new things started!!! ARGH!!! I just need to lock myself in, take in no new stimuli and finish what I have started! There must be (please!!!) others of you out there who suffer from the same sort of artistic frenzy??? If not maybe i need some medical intervention- JUST KIDDING!!
It is raining here today and after I return from my Reading tutoring duties, I plan to hide away and finish up several things- I'll post again soon!!

Friday, November 9, 2007

3 Pink Lovelies Complete!!

I have posted a picture of the center Lovely in a previous post but I had to show a group shot before I send the girls on their way to Mo in Oklahoma for the Dorcas Project. See http://mos-musings.blogspot.com . I( Imust learn how to embed a link into the text, but I have too little time right now to learn something technical!! EECK!!)
Anyway I really enjoyed creating these three and i can hear my swedish grandmother's voice in the back of my head telling how pleased she is that I used all of my left over fabric scraps to make the fabric!! Besides being incredibly thifty and frugal, my grandmother was an amazing gardener. I have so many things to thank her for!!

Thursday, November 8, 2007

New Quilt Journal Pages

I am pretty tired of birds and Garden Fairies right now, but I am not to get much of a break!! I delivered my art to GRAQCE in Reston, VA today and everyone was thrilled. The gls working at the time started shopping! Erica, the wonderful Artistic Director, asked if I could bring more Birds and as many dolls as I can make, when I go back up for the opening reception on November 30th!!!! it is SOOOOOOO Fabulous to be so well recieved!!
I do have some other projects to finish up and to share before I start on Round 2!

I have just finsihed another Quilt jouranl Page Swap on my Surface Designs group. this time I sent my page to Ann in France! The theme was Monochromatic Colors. I chose to work with Green. I have nto been a big fan of green till just recently- maybe it has something to do with being "delivered" from Oklahoma, though they have had much more rain recently than we have! As it was so darn hot there and the wind never stopped blowing, I really came to covet the lush greenness of the garden.

All of the fabric used in this collage piece was dyed by moi! I used the Setacolor dyes for both the sunprints and the trim. The background fabric is from a vintage linen napkin and I added dyed cheesecloth and then another trim piece over that and Stamped the word Grow on a piece of fabric/paper that I had made earlier. I did lots of beading on the piece but unfortunately that does not show up very well in this picture.

This is the page that Ann sent to me. Keep in mind that these two pieces passed each other somewhere over the Atlantic and we did not share our plans with each other, I am not sure that we both knew that the other was passionate about gardening either! I certainly did not know that she was, she may have seen some of my garden pictures that I posted to the group.

She paper pieced this rose from fabric that she had created by printing a photograph of a rose from her garden on fabric! I just love this piece!! as it turns out I am nuts about Pink Roses and I have one still blooming in my garden right now. It also turns out that she also only plants antique roses and has no use for those that do not have a fragrance!! Maybe we are twins that were separated at birth????? Serendipity and Sychronisity!!!!! I love it!!!

Monday, November 5, 2007

Birds and Fairies Everywhere!

It has been too long since my last post!! I have been pushing hard to get the 30 Garden Fairies and the Bird Dolls done for the Gallery in Reston, in between making a double batch of homemade rolls for Tom to take into work tomorrow and a batch of homemade Pretzels for Matthew to take into German Club for their Oktoberfest celebration!! I can now say that they are complete!! Everything is tagged and ready for delivery! I have so many other things to do and shows and gifts to get ready for, never mind two kids that have birthdays on either side of Christmas . Matthew, my soon to be 16 year old (EGAD!!!!), just informed me that Thanksgiving was only two weeks from this coming Thursday!!!! YIKES!!!!!

Enough whining here are my Wing Dings!! I love them! They are so much fun to create and each one developes her own personality!
Listen To Your Heart
Let Yourself Soar

Sing Your Own Song (version 2)

Follow Your Dreams

I will be making more birds as I want to have stock for my other events and to have stock to post on my Etsy site.

Here are the last of the Garden Fairies- the ones that I like the best.

I am enjoying creating the faces . The gals take on some real personality depending on how I shape the eyes and mouth! I have also been paying alot of attention to the backs of the dolls. I am a real stickler for the details and these girls must look good from all angle

I have also made some functional art using some of my collaged and paint scraped papers. The frames were covere d with my papers and then coated with many coats of a heavy varnish for extra durability. Mirros are very hard to photograph!!

The mirror in the center is about 4 inches square and the frame is 4inches all around. these will make nice occasional mirrors on a small wall. Hopefully people will like them, they are certainly one-of-a-kind!!

I will be back with another post in a day or two, as I have 5 or ten different projects in the works right now- all at various stages of "Doneness"! In the meantime please say a little prayer for us here in the Mid Atlantic- we are supposed to get some rain tonight and we need it desperately!!!

Keeping my fingers and toes crossed..............

LinkWithin

Related Posts with Thumbnails